12 Secrets to an Affordable Wall Art Arrangement That Looks Like a Million Bucks
This site contains affiliate links. I may earn a commission at no extra cost to you.
Creating an affordable wall art arrangement that looks like a high-end gallery display doesn’t require a massive budget. High-end displays often feature original art and custom frames, but you can get the same look for a fraction of the price.
What You’ll Learn in This Guide:
- Budget Sourcing: How to find downloadable digital prints, thrift store gems, and free items hiding in your home.
- Pro-Level Styling: The secret tricks designers use with matting, spacing, and optical illusions to elevate cheap frames.
- Clever Hacks: 12 step-by-step ideas to build a cohesive, custom-looking gallery wall.
Read on for 12 budget-savvy tricks to transform your space without draining your bank account.
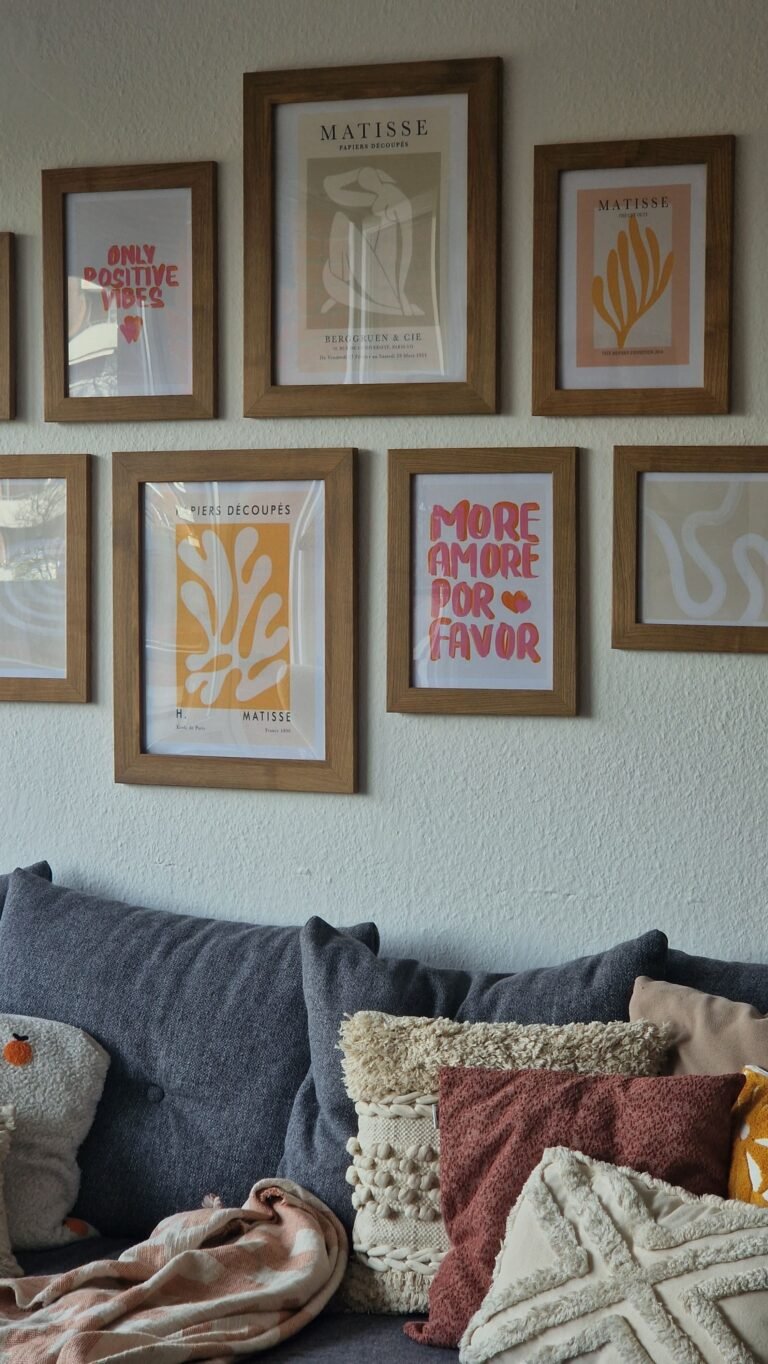
The Sourcing Secrets: Finding the Goods
Before hanging a masterpiece, you need the right raw materials. Sourcing is where most people overspend, but it offers the biggest potential for savings.
Where to Find Budget Materials:
- Digital Repositories: Free public domain artwork and low-cost digital downloads.
- Thrift Stores & Flea Markets: Deeply discounted frames, vintage mats, and original sketches.
- Everyday Objects: Postcards, fabric swatches, or book pages you already own.
Secret #1: Printable Art Digital Goldmine
You don’t need a museum gift shop for classic art prints; you just need a printer.
Where to Find Digital Art:
- Free Public Domain Archives: Thousands of classic and modern pieces from the National Gallery of Art, The Met’s Open Access program, and Rawpixel.
- Affordable Contemporary Options: Etsy offers unique digital art downloads for under $5.
The “Gallery” Printing Trick:
Paper choice transforms a basic digital file into an authentic-looking piece.
- Skip standard, thin printer paper.
- Order heavyweight cardstock or matte presentation paper at a local print shop.
- Frame it behind glass for a high-end look indistinguishable from expensive prints.
Pro Tip for Statement Pieces:
Use free tools like Rasterbator to print large images across multiple standard sheets of paper. Trim and tile them together to build an impactful, oversized piece for minimal cost.
Secret #2: Thrift Store Gold: Reframing the “Ugly”
When thrifting for an affordable wall art arrangement, ignore the art itself; focus entirely on the frame. High-end retail frames easily cost $50 to $100+, but thrift stores sell solid, well-built frames for a fraction of that.
What to Look For at Flea Markets & Thrift Stores:
- Material: Heavy, solid wood construction instead of cheap veneer or plastic.
- Details: Intricate carvings, unique moldings, or interesting historical textures.
- Scale: Oversized or unusually shaped frames with great structural bones.
The “Buy the Bones” Strategy:
- Head straight to the art section at any local thrift shop or flea market.
- Ignore dated, faded prints (like a 1970s sailboat painting) and evaluate the border.
- Purchase the piece for the price of its frame (often $3–$5).
- Remove and discard the old art inside.
- Upgrade the frame with a coat of spray paint, wood stain, or a rubbed finish.
Secret #3: Beyond the Frame: Textiles and Found Objects
Paper isn’t the only material that belongs on a wall. Incorporating varied textures adds multi-dimensional depth and gives your space a curated, high-end look.
High-Impact Material Ideas:
- Framed Vintage Scarves: Stretch silk or pattern-printed scarves inside simple frames. Fabric reflects light differently than paper, adding instant luxury.
- Woven Baskets & Chargers: Hang flat, shallow baskets in an asymmetrical cluster to create an organic, bohemian dynamic.
- Architectural Salvage: Mount old wooden corbels, iron grates, or carved panels directly onto the wall as standalone focal points.
Why This Trick Works:
- Dynamic Texture: Breaks up flat paper prints across a large gallery space.
- Budget-Friendly: Sourced easily from thrift stores, estate sales, or existing home items.
Secret #4: The “Free” Gallery: Using What You Have
The most expensive-looking displays often cost nothing at all. Sourcing items directly from your home creates an affordable wall art arrangement that feels completely unique, personal, and high-end.
Unexpected Items to Frame:
- Children’s Artwork: Frame toddler scribbles inside a large white mat to mimic modern abstract art.
- Travel Ephemera: Grid-arrange ticket stubs, maps, postcards, or foreign currency to tell a story.
- Vintage Book Covers: Remove graphic dust jackets or embossed cloth bindings from old hardcovers.
- Botanical Pressings: Press garden leaves or dried flowers between glass panels for quick natural art.
Why Personal Decor Feels Luxe:
- One-of-a-Kind: Avoids mass-produced store prints everyone else owns.
- Story-Driven: Elevates ordinary keepsakes into meaningful conversation pieces.
- Zero Cost: Sourced entirely from drawers, closets, and existing storage boxes.
The Styling Secrets: Making it Look Expensive
Once you source your items, execution determines the final quality. Strategic placement differentiates an affordable wall art arrangement from an expensive-looking gallery display.
Secret #5: The Power of the “Anchor” Piece
Scale defines luxury in interior design. Hanging dozens of small 4×6 frames creates visual clutter, whereas pairing one substantial central piece with smaller accents creates a curated look.
Choosing Your Anchor:
- Large Digital Prints: Engineering prints, vintage maps, or oversized blueprints.
- Thrifted Mirrors: Expansive framed mirrors that bounce light and enlarge the space.
- DIY Canvas: A large statement canvas painted with bold, abstract brushstrokes.
How to Style Around an Anchor:
- Establish a Focal Point: Position the largest piece slightly off-center or directly in the focal zone.
- Build Outward: Cluster smaller, budget-friendly frames around the main anchor piece.
- Direct the Eye: Allow the anchor to set the scale so the smaller details complement the display.
Secret #6: Monochromatic Frames: The Great Unifier
Mixing gold, black, wood, and silver frames on one wall often looks chaotic. Unifying mismatched frames with a single color transforms them into an intentional, high-end collection.
Popular Spray Paint Finishes:
- Matte Black: Delivers a modern, gallery-like contrast that highlights artwork.
- Crisp White: Creates an airy, Scandinavian look ideal for bright, minimal spaces.
- Antique Gold/Brass: Adds traditional warmth and vintage elegance.
How to Unify Thrifted Frames:
- Disassemble frames by removing the glass, backings, and artwork.
- Lay all mismatched frames flat on an outdoor tarp or drop cloth.
- Apply 2–3 light coats of spray paint in one uniform color finish.
- Let frames dry completely before reassembling and hanging.
Why Unified Paint Works:
- Intentional Shapes: Uniform color highlights frame textures and profiles instead of random finishes.
- Instant Cohesion: Makes inexpensive thrift store finds look like a custom frame set.
Secret #7: Matting is Non-Negotiable
Putting a print into a frame of the same size makes it look cheap. Adding a proper mat provides essential visual space, signaling that the artwork is valuable and deserves attention.
Why Matting Matters:
- Visual Breathing Room: Separates the art from the frame to create depth.
- Instant Elevation: Makes inexpensive digital prints look like museum-quality pieces.
- Professional Contrast: Highlights the artwork’s colors against a clean border.
Budget-Friendly Matting Hacks:
- Buy Pre-Cut Mats: Skip custom frame shops ($20+) and buy pre-cut mats at craft stores or IKEA ($2–$3).
- Scale Up the Frame: Select a frame two to three sizes larger than your artwork (e.g., place an 8×10 print inside an 11×14 frame with a wide mat).
- DIY Custom Cutouts: Use heavy cardstock and a utility knife to cut custom borders for oddly sized art.
Secret #8: The Grid Layout (Symmetry = Sophistication)
If arranging an eclectic gallery wall feels daunting, a grid layout is your best friend. It is virtually foolproof and creates a sleek, high-end look.
How to Execute a Grid Display:
- Use Matching Frames: Choose identical frames in color and size for a seamless pattern.
- Keep Precise Spacing: Maintain exactly 2 to 3 inches between every frame horizontally and vertically.
- Align Perfect Angles: Use a level and painter’s tape to ensure straight, crisp grid lines.
Best Artwork Ideas for Grids:
- Black-and-white family or travel photography
- Botanical sketch series
- Architectural line drawings
Why Symmetry Looks Expensive:
- Order & Intent: The human brain naturally perceives strict balance as high-end and custom-designed.
- Architectural Impact: Creates a structured focal point that anchors large, open walls.
Secret #9: The “Floor-to-Ceiling” Optical Illusion
Stopping a gallery wall at eye level often leaves art floating awkwardly. High-end designers fill vertical space to draw the eye upward and make rooms feel taller.
How to Build a Salon-Style Wall:
- Stretch Vertical Bounds: Hang pieces from just above the baseboards all the way up to the ceiling line.
- Anchor the Center: Place your strongest, highest-quality art at eye level where it receives direct attention.
- Tuck in Filler Items: Position smaller, low-cost pieces (tiny frames, decorative plates, small mirrors) along the top and bottom edges.
Why Vertical Expansion Works:
- Height Illusion: Elevates ceilings visually to make small rooms feel larger and grander.
- Budget Flexibility: Maximizes an affordable wall art arrangement by turning inexpensive “filler” items into a lush, cohesive display.
The Finishing Touches (Renter-Friendly & Sustainable)
Proper lighting and installation elevate your display while protecting your walls and security deposit.
Secret #10: Lighting: The Gallery Effect
Art looks flat and low-end without proper lighting. High-end galleries use focused spotlights to add depth and shadow. You can replicate this museum-quality look without hiring an electrician.
Renter-Friendly Lighting Options:
- Battery-Operated Picture Lights: Wireless LED fixtures that mount directly above frames using adhesive strips or small screws. Remote-controlled models offer instant warmth and high-end ambiance.
- Clip-On Spotlights: Industrial-style clip lights mounted to nearby shelving and angled toward key focal points.
Why Directional Lighting Elevates Art:
- Highlighting Anchor Pieces: Positioning a single light over your main print draws immediate focus.
- Adding Visual Depth: Directional beams enhance paper texture, frame details, and glass reflections.
Secret #11: Command Strips: The Renter’s Best Friend
Fear of losing a security deposit often stops great wall design before it starts. You don’t need a hammer or nails to build a secure, high-end display.
Why Adhesive Strips Work:
- Heavy Weight Capacities: Heavy-duty interlocking strips can support frames weighing up to 16 pounds or more.
- Damage-Free Removal: Tab-release adhesives pull away cleanly without chipping paint or leaving drywall holes.
- Layout Flexibility: Lets you adjust, swap, or re-level frames whenever inspiration strikes.
How to Install Securely:
- Clean the back of the frame and the wall surface with rubbing alcohol.
- Press interlocking strips together until they click.
- Apply strips to the upper sides of the frame, press firmly against the wall for 30 seconds, and let the adhesive set.
Secret #12: The “Wait and See” Rule (Curating vs. Decorating)
There is a major difference between buying mass-produced store art to fill space today and curating a collection over time. Luxury stems from patience; the most high-end displays feel gathered, personal, and timeless rather than store-bought overnight.
How to Curate Over Time:
- Start Small: Hang your central anchor piece alongside one or two supporting elements.
- Pause and Live with It: Leave intentional negative space while you search for meaningful items.
- Layer Gradually: Add thrifted frames, travel souvenirs, or vintage finds as you discover them.
Why Patience Elevates Your Display:
- Avoids Trend Fatigue: Prevents buying fast-decor items that quickly look outdated.
- Adds Character: Ensures your affordable wall art arrangement feels authentic, story-driven, and thoughtfully curated over time.
Conclusion
A high-impact, beautiful home doesn’t require a high-limit credit card. It simply takes resourcefulness and a willingness to see potential in the ordinary.
Key Takeaways for a Gallery-Worthy Wall:
- Source Smarter: Leverage digital archives, thrifted frames, and items hiding in your home.
- Style Intentionally: Use wide matting, paint-unified frames, and anchor pieces to command attention.
- Curate with Patience: Build your display over time to ensure your affordable wall art arrangement feels personal and timeless.
Pick a wall this weekend, explore local thrift stores or public domain archives, and grab your Command Strips. Your walls are a blank canvas, and now you have every tool needed to style them like a millionaire on a budget.